
3iMedia GmbH
How to use Option Conferencing
21.03.2020
Follow these simple steps to create a conference meeting (including Exchange resources)
- If the conference web extension is not shown in your SwyxIt! client, please load the "3iMedia Conferencing 2017" skin first.
- Switch to the "Conference" tab as shown in this screenshot.
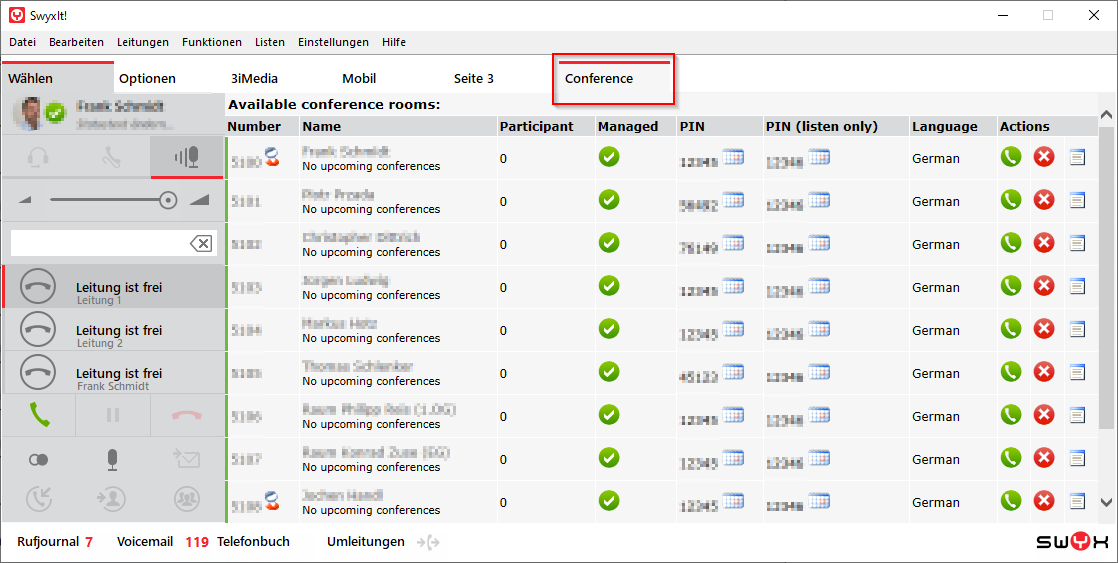
- You can see a list of all manged and unmanged conference rooms. Each of them has the following items: number, name, number of participants, manged (yes/no), PIN, PIN for listen only participants, language, dial button, close button, edit button.
- Please click the calendar icon next to the PIN. An ICS-file will be downloaded. Open this file in Outlook.


- Set the time when the conference should take place and invite all the mandatory and optional participants.
- If Exchange integration is set up the room resource should be resolved automatically. Otherwise check the Exchange configuration.
- If Exchange integration is set up you can overwrite the PIN for this dedicated conference by just replacing the predefined PIN in the text. Please note that the new PIN has to have 5 digits as well.
- After sending the invitation the planned conference will be shown in the conference room list overview. You can see the next conference with time and duration. The PIN for the conference is shown in bold letters.

- When the conference has started to info text will show the end time and the remaining time of this conference.
- You can change the PIN of this conference at any time by changing the PIN in your invitation and send an update to all participants.
- The conference appointments are synced every 5 minutes. So it might take a while until the created or changed appointment is updated.
